1 – Connect your DevDuino and an Arduino Uno Board
2 – Configure your Arduino Uno as an ISP
3 – Make the wiring
4 – Burn the bootloader
5 – Reconfigure your IDE settings
1 – Connect your DevDuino and an Arduino Uno Board
To burn the DevDuino bootloader, connect to your computer both your DevDuino and an external Arduino Uno board which is going to be used as an In-System Programmer.
2 – Configure your Arduino Uno as an ISP
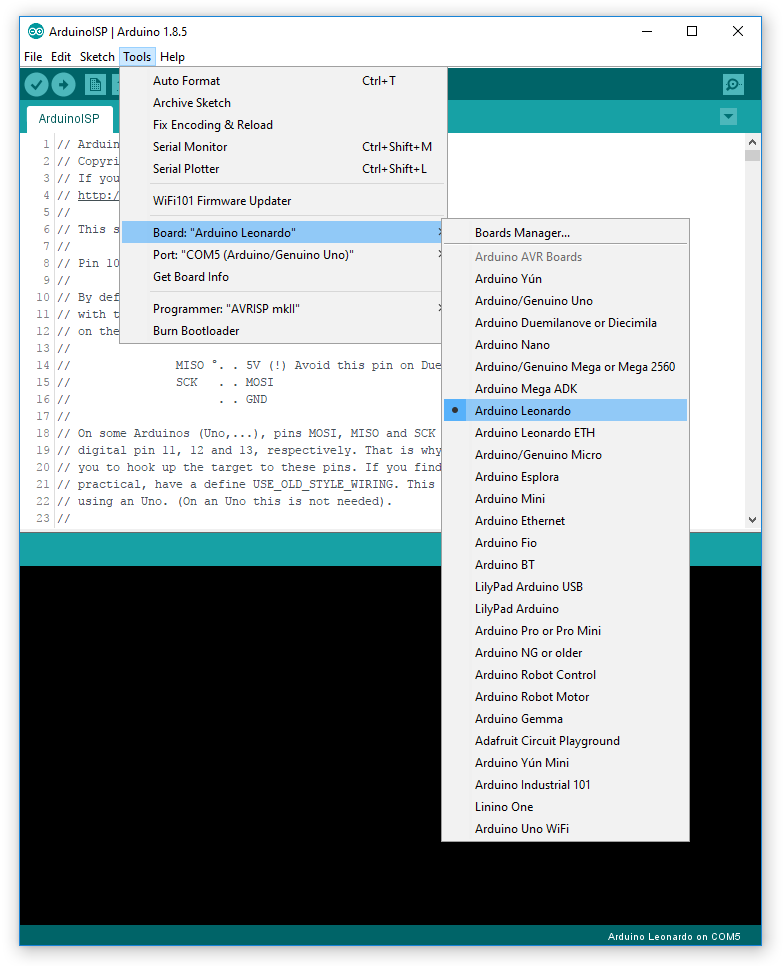
2.1 Go to Tools>Board and select Arduino/Genuino Uno.
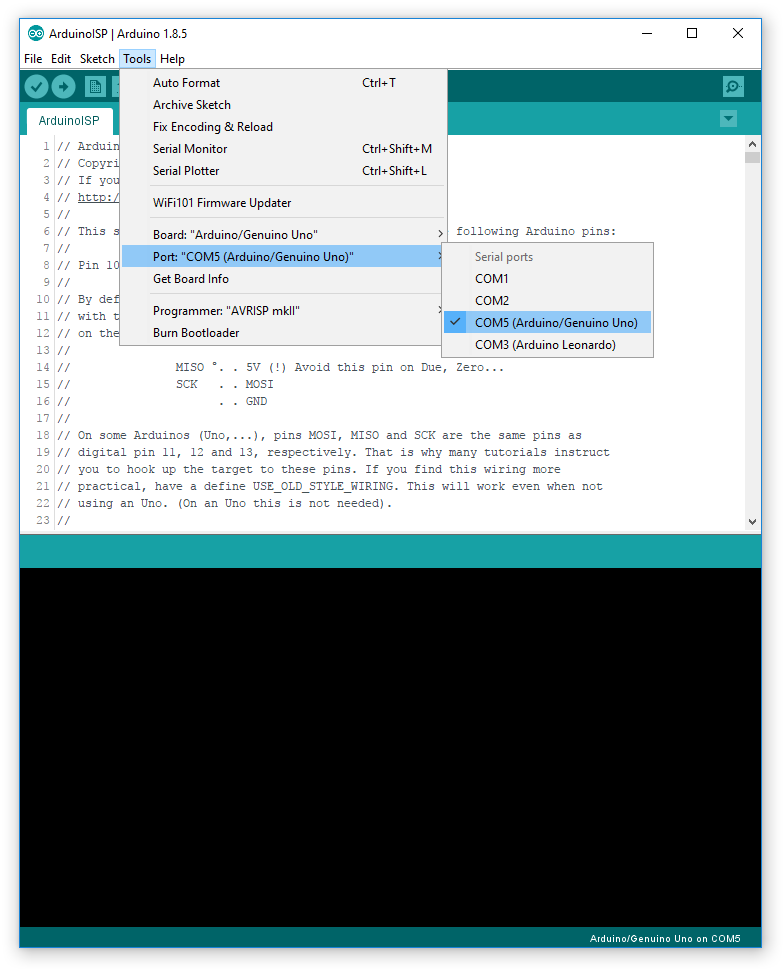
2.2 Go to Tools>Port and select the COM port connected to your Arduino/Genuino Uno.
2.3 Now upload the following example: File>Example>11.ArduinoISP>Arduino ISP.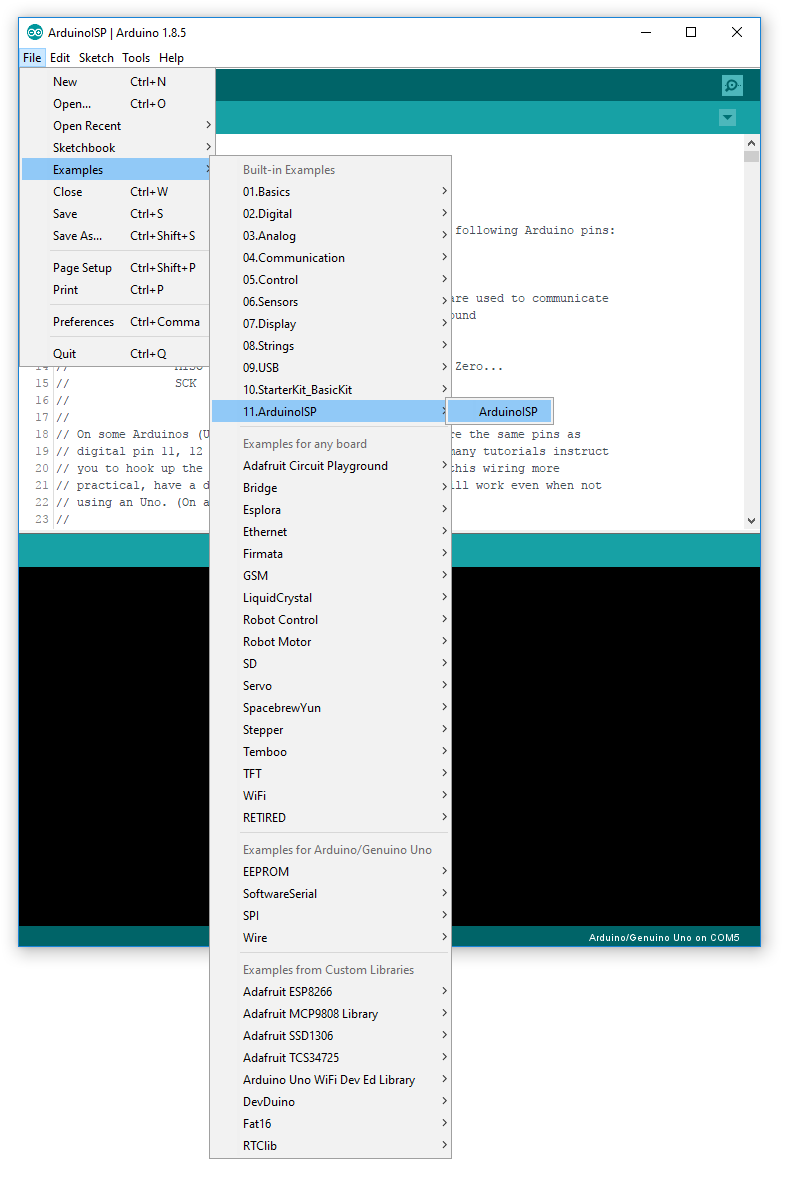
3 – Make the following wiring
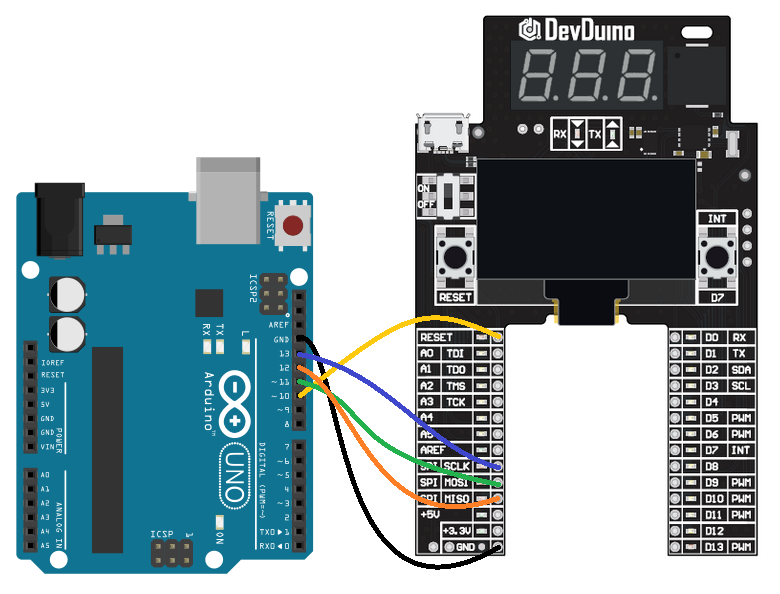
Arduino UNO D13 => DevDuino SPI SCLK.
Arduino UNO D12 => DevDuino SPI MISO.
Arduino UNO D11 => DevDuino SPI MOSI.
Arduino UNO D10 => DevDuino RESET.
Arduino UNO GND => DevDuino GND.
Please note that both boards must be powered on.
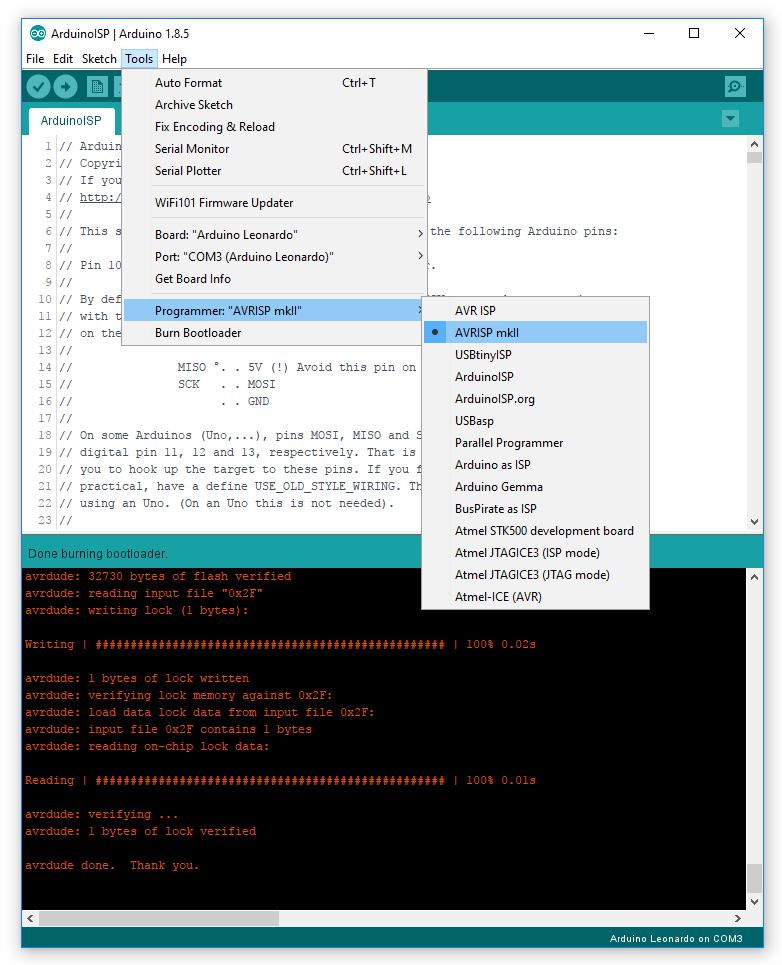
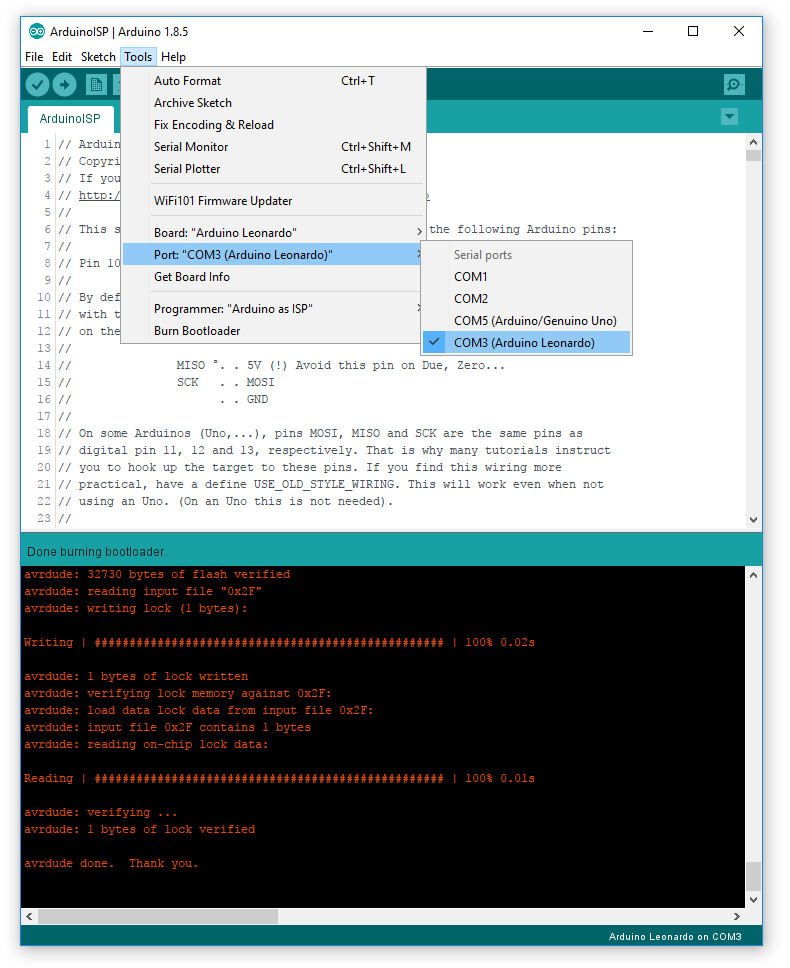
4 – Burn the bootloader
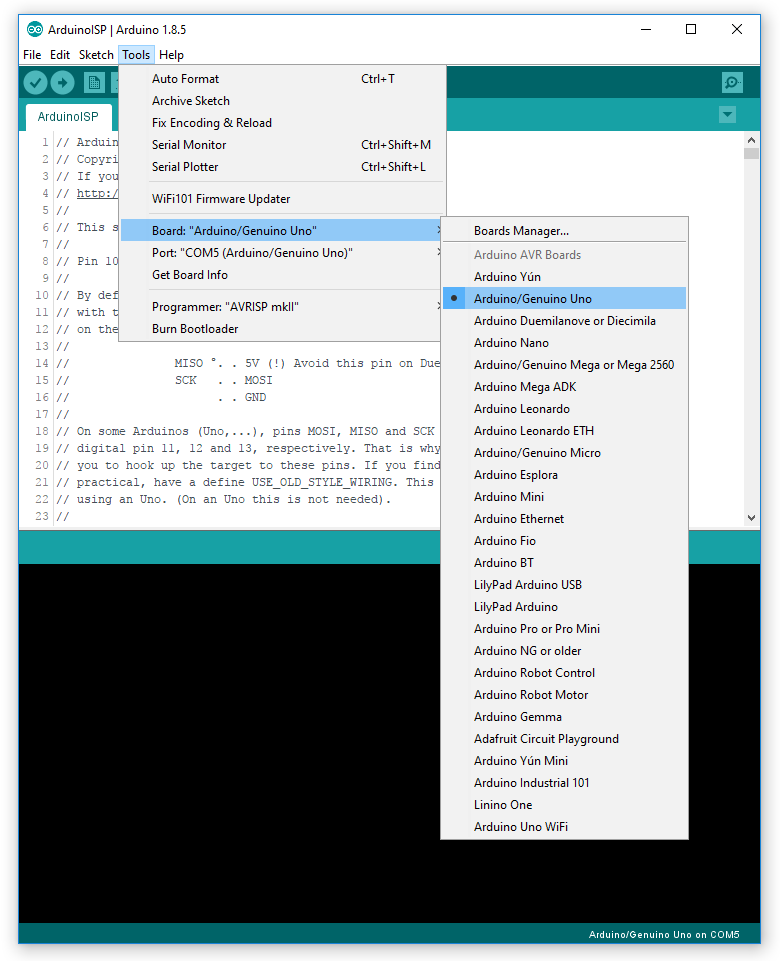
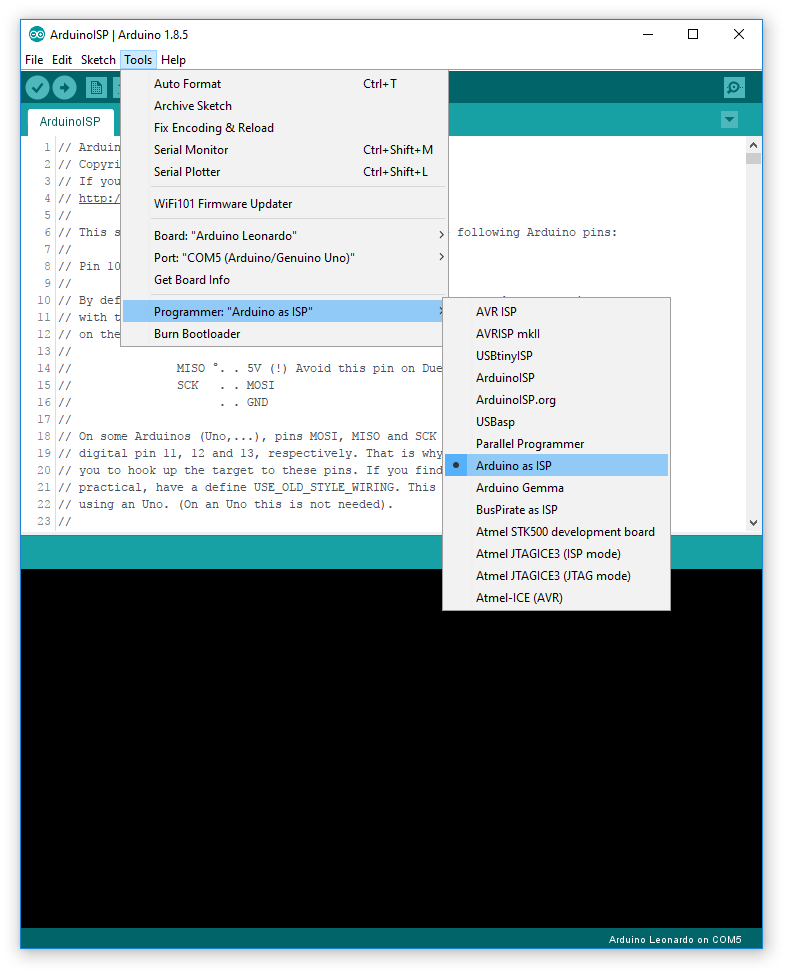
4.1 Configure your board as an Arduino Leonardo but keep the COM port of the Arduino Uno.
4.2 Configure your programmer: Arduino as ISP.
4.3 Click on Burn Bootloader.
This process should take around a minute until it displays “Done burning bootloader.“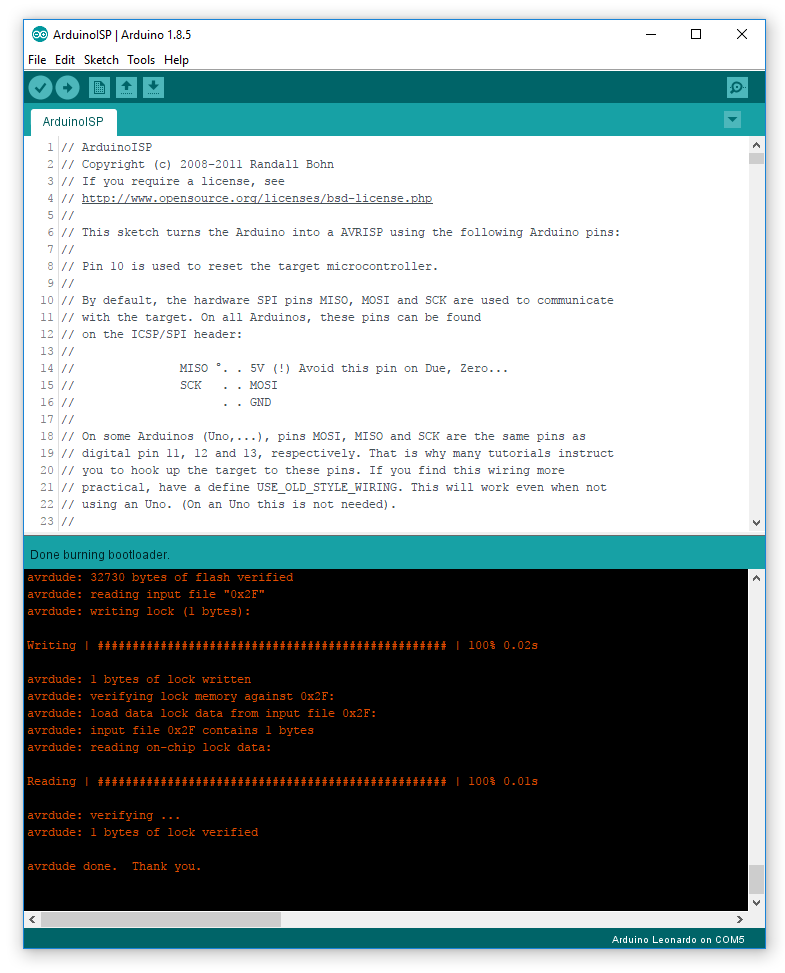
Once done, D13 LED should be blinky.
5 – Reconfigure your IDE settings
Congratulations! Don’t forget to reconfigure your Arduino IDE though.
5.1 Go to Tools>Port and select the COM port connected to your Arduino Leonardo.
5.2 Go to Tools>Programmer and select AVRSP mkII.